Perspective – an overview
This page will just cover an overview of perspective because it’s just too big a subject for me to do it justice in this format. Perhaps it might wet your appetite to know more (in which case Google, YouTube …….and your local library will be useful to explore), or maybe you just want a feel for what it’s all about.
The reason for using perspective is to give a sense of depth .
.
The artist has to fool the eye and brain into believing that it can see a real 3D view when looking at a flat surface. For that we need to know what the brain will accept as signals that it is seeing a real world view with depth. Perspective in art is all about those signals……..the tricks we can play on the mind to get it to believe what we want it to believe. These strategies (or tricks) include “Foreshortening”, “One Point Perspective”, “Two Point Perspective”, “Aerial Perspective”….along with others. Some of these I will give an overview of here…… some I will leave up to you….the lovely reader (eg Zero Point, Three, Four, Five and even Six Point Perspective…….. it’s interesting but you probably wont ever use more than 3 point Perspective….and even that is unlikely, hence I haven’t covered it)
 Don’t let the apparent enormity of the subject scare you……. just take what you need from it and discover the rest at whatever rate suits you. Those who you who drive cars don’t need to know how the car works to drive it do you. It’s enough to learn a few rules and just get on with it.
It’s all too easy to automatically think that “Perspective” in art is all about how we might draw an object but in fact it’s perhaps more accurately defined as how to present a piece of art so that there is a sense of depth, of 3D, of convincing the viewer that what they are looking at isn’t, after all, two dimensional. Drawing isn’t the only technique to be considered here…..it’s perhaps just the most obvious, and will be tackled at great length later……. But first, an overview of the subject.
There’s a number of ways that getting depth in art can be achieved….. but no single method will really do the job on its own. The aspiring artist needs to aware of, and use, as many of the techniques as is required.
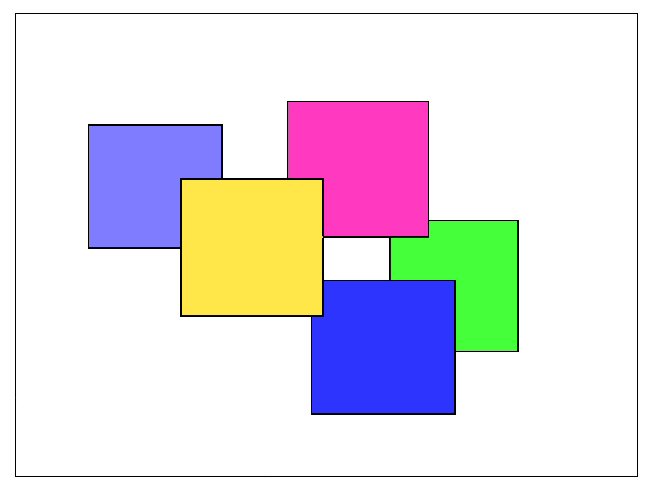 So….how can we create depth? …well you can suggest that some features are behind others. Looking at the image above, we would accept that the yellow square is at the front, the green square is furthest back and the pink and blue squares are somewhere between. To apply this to a landscape lets use an image of trees that I created.
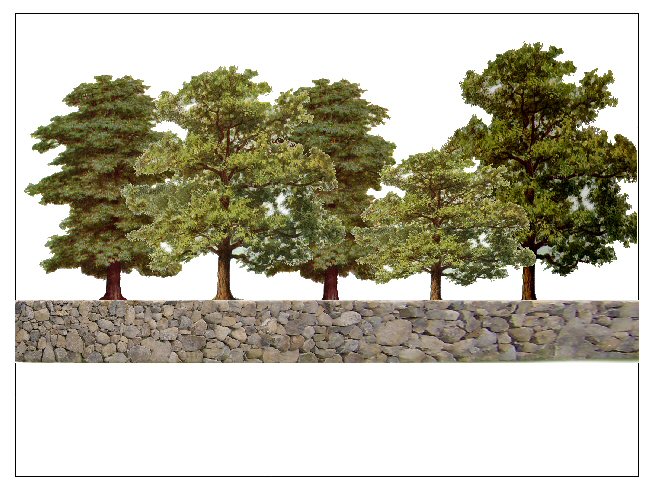 Imagine that in your landscape you’d shown trees that did what I have shown above ie some were in front of others….. some of the trees would therefore be nearer the viewer. If you look carefully at the image that I have created, then you’ll see that the smallest tree (ie the second from the right) is clearly in front of adjacent trees. Other trees are given their place (ie depth) in the scene by observing whether they are in front, or behind adjacent trees.
Consider tonal values as well.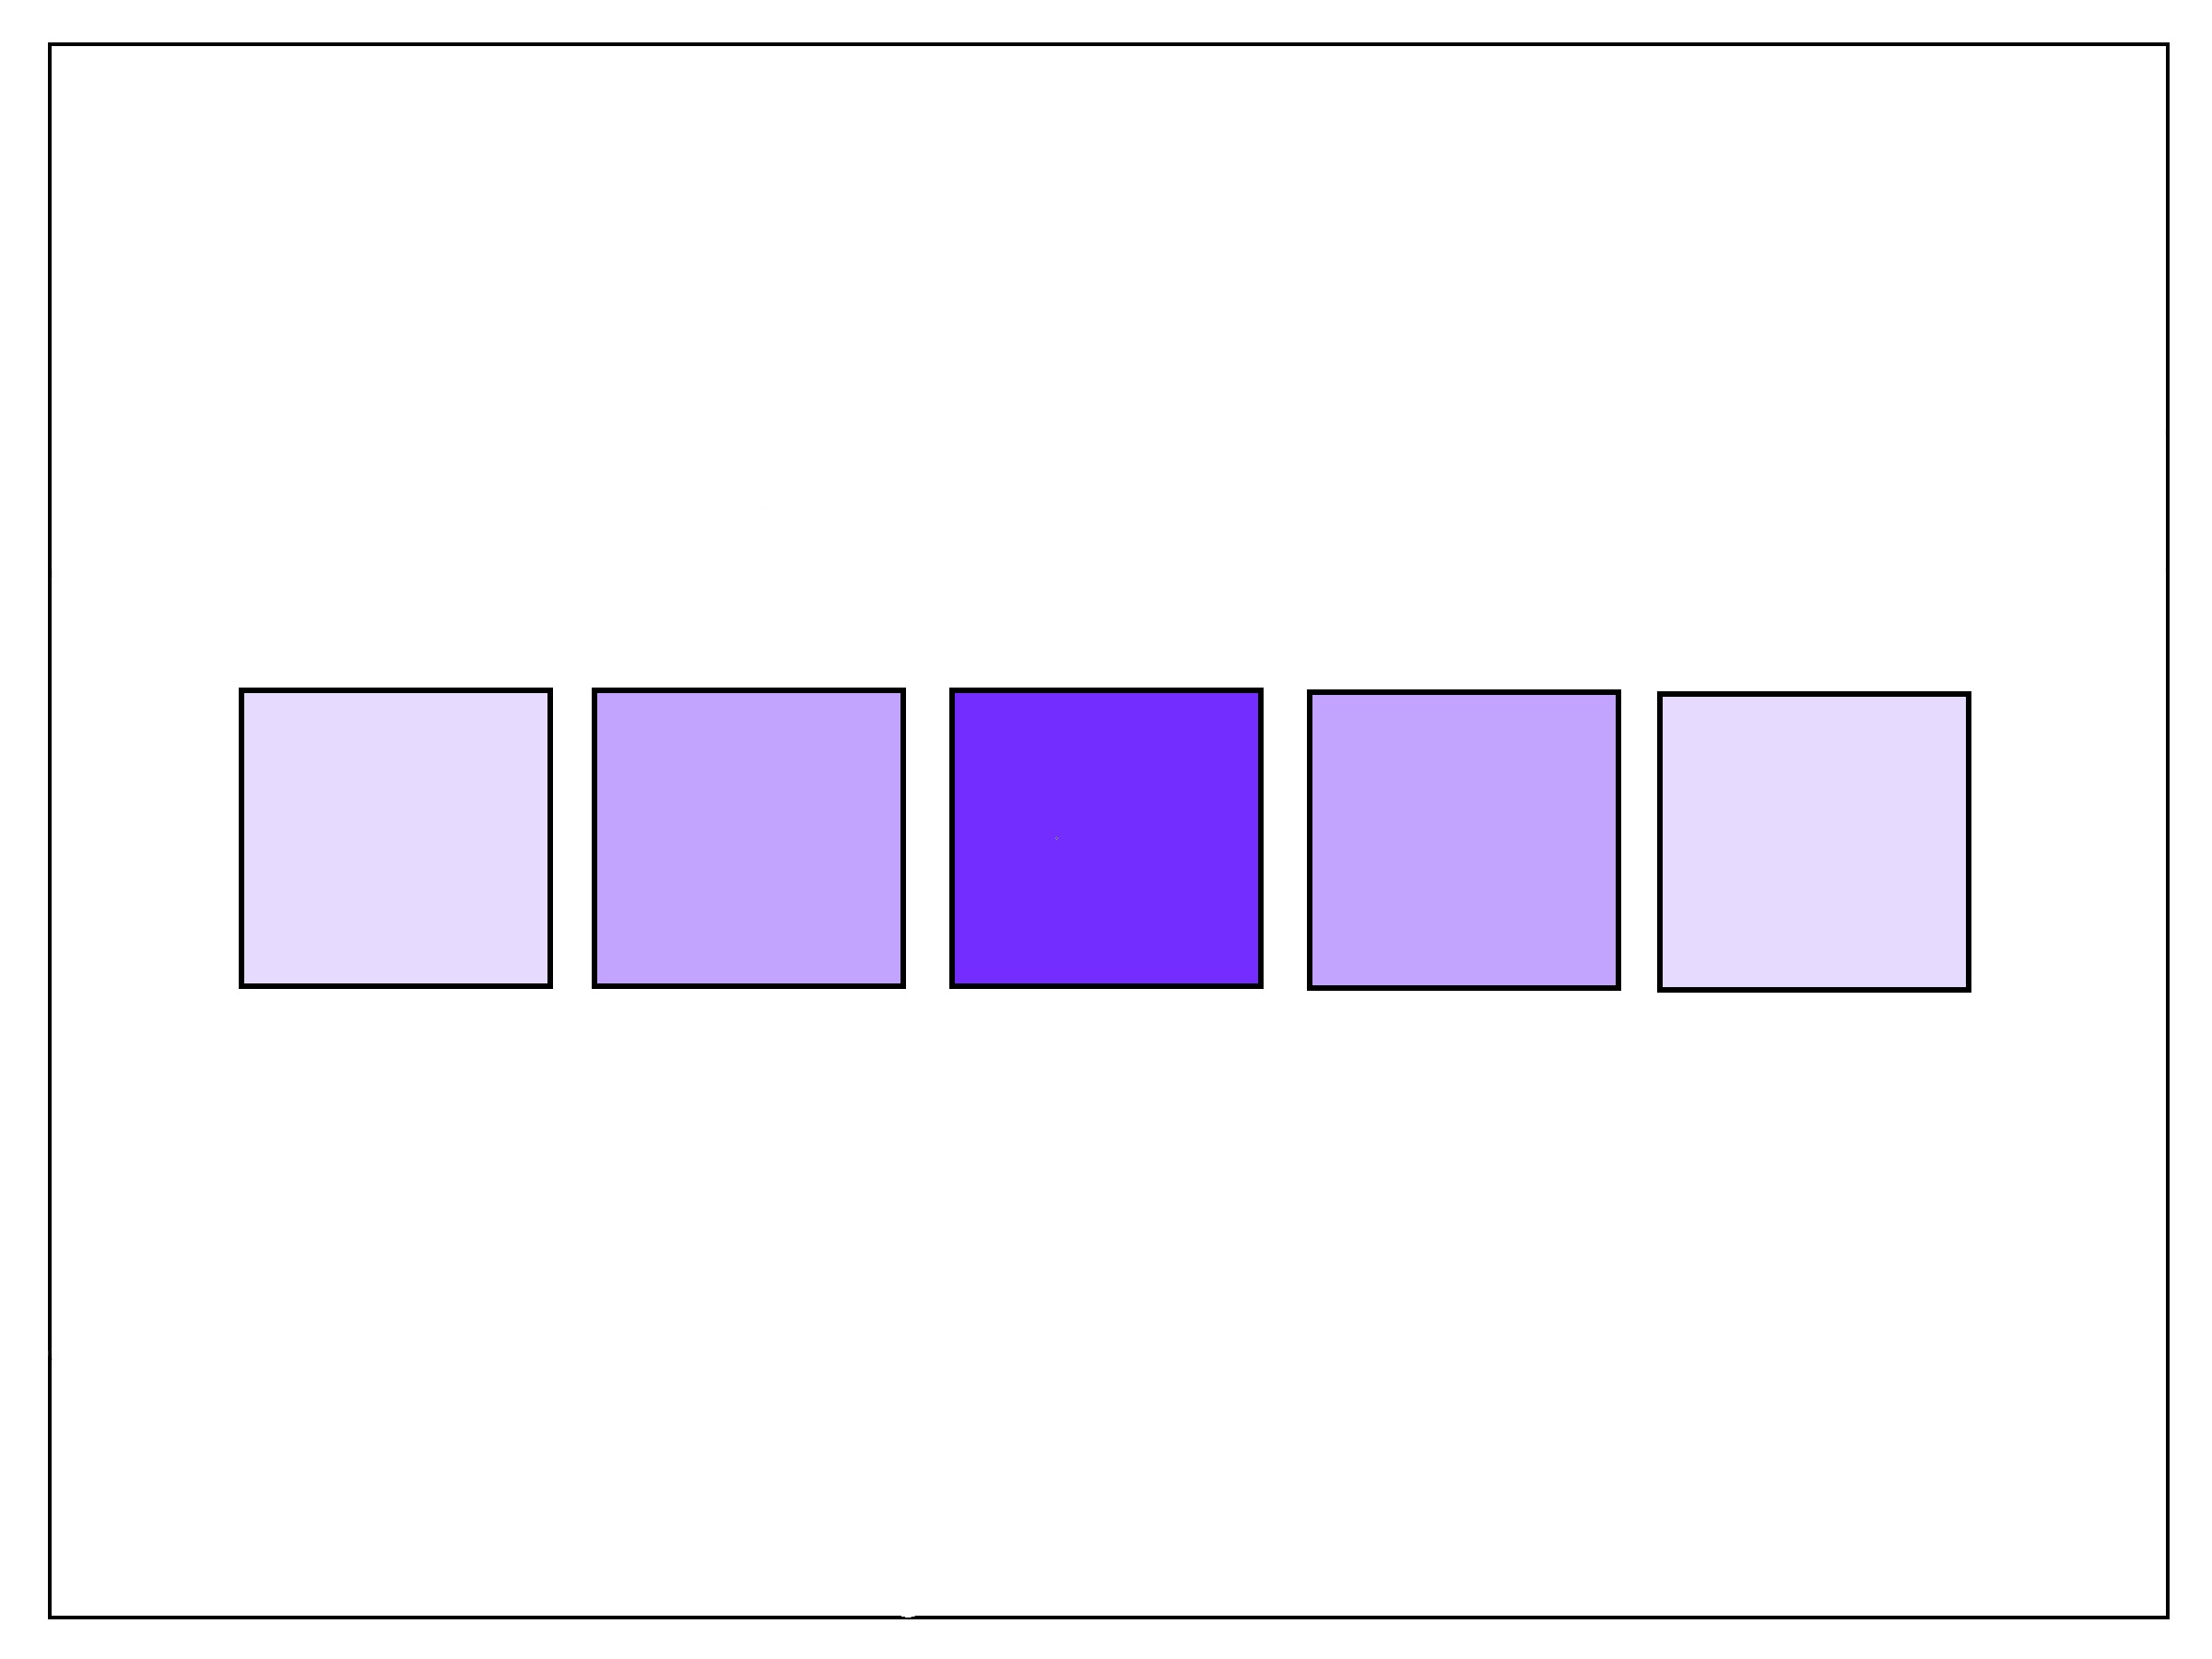 Remember that “tone” and “colour” are not the same thing. For the purposes of this exercise consider tone (or “value”) to be varying “strengths” of the same colour. For example…. The image that I have created above is of 5 squares that have had the different tonal values of the same colour applied so that they have descending orders of strength either side of the most prominent one in the centre. We mediately notice the one in the centre because of its stronger tone.
Lets apply this technique to the previous image of trees……and notice how we can choose to “push” some trees back and bring others forward.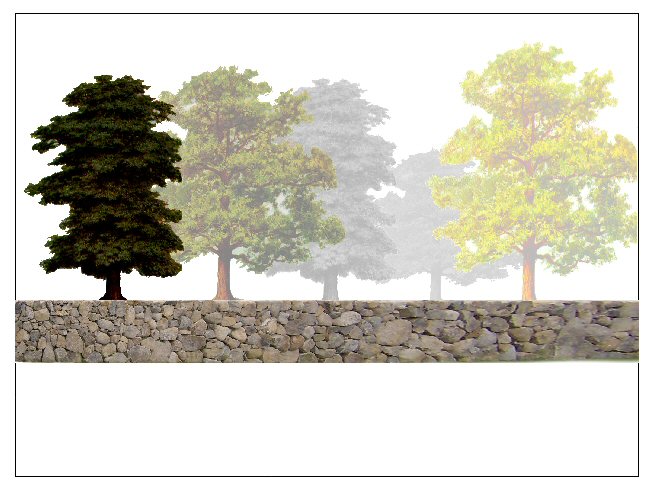 Having applied this idea to my previous image of trees note that the application of the different “strengths” of tone has completely changed the apparent depth of each tree. The smallest tree (ie second from the right) which was at the front in the previous image, is now furthest away.
This time the nearest tree is the one on the far left. Note that this is exactly the same image as the previous one except I have used image editing software to create this “different reality”
Another way that we might suggest that a feature is in front or behind another feature is to give similar items a different size. The image below might well give the impression that the centre square is actually nearer to the viewer.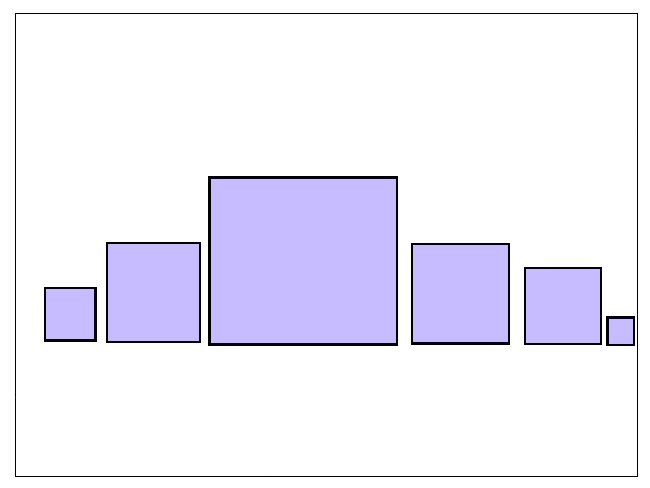 So to apply this to a simple landscape we might create a tree in the foreground larger than an essentially identical tree that is in the background. This principle is illustrated using squares. The next image uses the same method, ie I took the an image of a tree and copied it a number of times changing only the size.
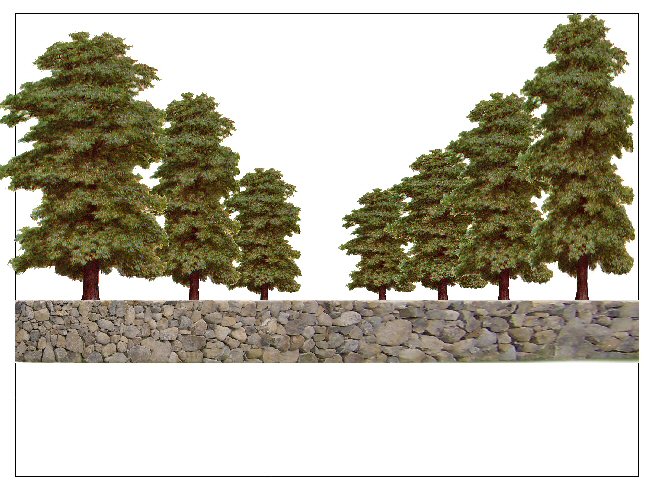 It isn’t difficult to imagine that the trees recede into the distance as we look nearer to the centre of the image. Only the size of each tree has been changed to suggest this depth.
What would happen if each of these principles of placement (ie one in front of another) tonal values and size are used at the same time?
Well…..the next image attempts to show these techniques together in a very simple landscape that I created using image editing software (specifically Paint.net which is free)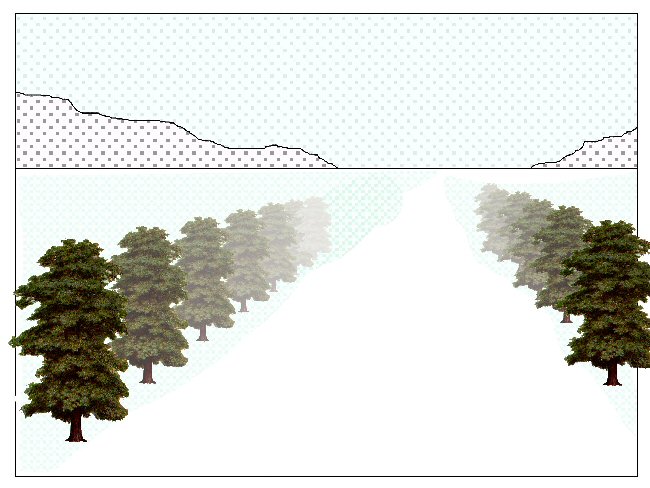
This image has been created by copying a whole series of exactly the same image of a tree and reducing each one in size and reducing the tonal value. Then I have placed each successive image behind the preceding one giving the illusion of depth.
The total image gives an idea of what using these techniques can achieve.
Of course, if this had been done using watercolour and had the background image of mountains and sky followed the same rules then we would have a very convincing landscape with depth. I’ve used image editing software to make life easier for myself as I create a digital image ready to be inserted directly into the website.
Below is a landscape that my good friend Alan Owen painted some time ago. In it we can see lots of elements of perspective in use….. including Aerial Perspective (note the fade out of the buildings as they recede)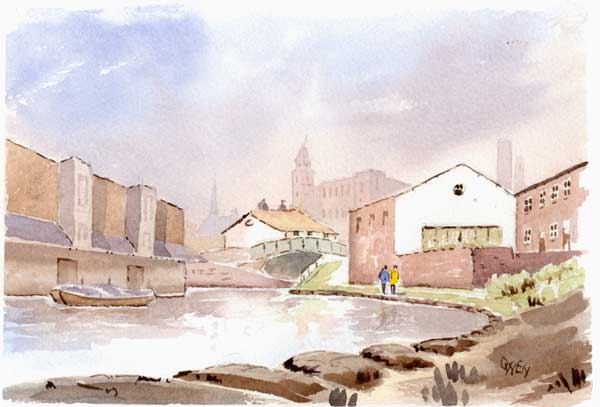
So……there are different kinds of perspective tools that we can use, and I have only given an overview here, but they include (click the hyper-linked title below to go to another page for a more detailed explanation):-
Atmospheric (sometimes called Aerial or Colour) Perspective
Foreshortening
Linear Perspective – I have covered 2 types of this:-
One Point Perspective
Two Point Perspective